If you use Adobe Camera Raw as your raw converter for digital camera raw files, you might want to be able to open your raw files in Camera Raw when you double-click them. For most files, you would do this in your operating system by changing which application opens the camera raw file type.
But with Camera Raw, there’s a catch. Camera Raw is not a standalone application, so you can’t associate it directly with a file type. It turns out that this is not a big deal, because Adobe Photoshop must open camera raw files in Camera Raw anyway. So the solution is to associate camera raw files with Photoshop. I show the steps below for Mac OS X; the steps for Windows are similar.
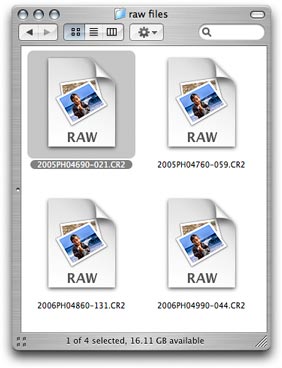
1. On the desktop, select a raw file of the type you want to open in Photoshop. I’ve selected a CR2 file from a Canon digital SLR.
2. Choose File > Get Info (Command+I).

3. From the Open With pop-up menu in the Get Info window, choose the version of Photoshop that you want to use to open your raw files.
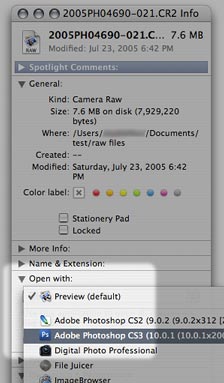
4. The file icon updates to indicate that Photoshop will now open it.
![]()
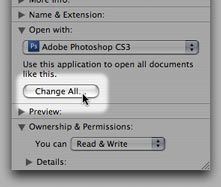
5. Click “Change All” so that your change applies to all files of the same type. Other file icons may not update immediately, but the change has taken effect. From now on, when you double-click that type of a raw file, it will open in Photoshop, which will then open it in Adobe Camera Raw.
Because the file association is tied to a specific file type, making this change affects only the file type you’ve changed. You’ll need to associate each different raw file type separately. For example, if you made this change for NEF (Nikon) raw files and then you later work with some CR2 (Canon) raw files, you’ll have to associate the CR2 files with Photoshop too.
(If you’re having trouble getting Camera Raw to see your raw files in the first place, try updating Camera Raw. Support for new cameras is added several times a year. Either download the latest version from adobe.com, or run the Adobe Updater utility that came with Photoshop. Note that the current version of Camera Raw may not work with older versions of Photoshop. If you are trying to edit a new camera’s raw files in a version of Photoshop that’s too old for the current version of Camera Raw, you should either upgrade Photoshop or use the free Adobe DNG converter to convert raw files to the DNG format, which older versions of Camera Raw can edit.)
Thanks to Céline C. for asking this question!


